A daily weather icon is useful for deciding which days to investigate. It is less useful for deciding exactly when to start a portrait session or whether the return walk overlaps a shower. Photography usually needs a time window, so move from the daily overview to the hours that matter.
Use the daily view for the first decision
Start with broad suitability: available daylight, the overall weather pattern and whether the day deserves closer inspection. A daily summary compresses changing conditions, so it cannot describe every hour equally well. Check what period the displayed high, low or precipitation probability covers.
Do not infer the hourly pattern from the icon. A day described as rainy may have a useful earlier session; a sunny summary can still conceal an inconvenient period for a particular subject. Look for a suitable window instead of sorting entire days into perfect and unusable categories.
Expand the session, including setup and return
If the photographs need an hour, investigate the time before and after that hour too. Setup, walking between locations and packing can extend exposure to weather. A portrait plan also needs workable conditions for the people involved, not only for the camera.
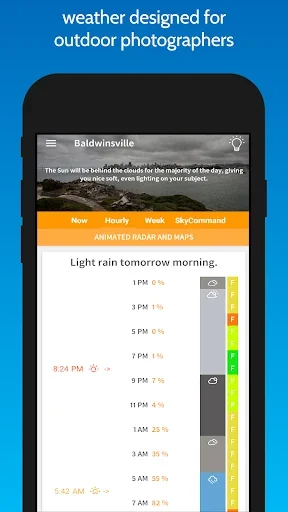
The NWS forecast-products guide describes hourly graphs that combine elements such as temperature, wind, humidity and precipitation probability. Read these as related inputs for your chosen period rather than allowing one appealing number to decide everything.
Read probability with its location and duration
The NWS precipitation explanation ties the chance to a point and a specified time period. Percentages from different time windows are therefore not automatically interchangeable. Do not add hourly probabilities or average them into a daily number without knowing how the provider defines the forecast.
Likewise, more frequent labels do not prove a forecast is perfectly precise. Check update times and location selection. An apparent one-hour gap in rain may move when the forecast changes, so reserve an alternative if the session has a tight deadline.
Turn the window into a Fotocast session
Fotocast offers photography weather, Fotoscore, daylight phases and a session manager. Use the weather view to investigate a window, then keep the actual session locations and plans organized. Read weather alerts as prompts to recheck rather than as a promise that every change will be captured or arrive in time.
For example, shortlist Saturday from the daily view, then compare the late-morning session with an afternoon alternative. If wind becomes less suitable for portraits at the first location, choose the sheltered option or another time before asking people to travel. This is an illustrative decision process, not a forecast for a real Saturday.
Keep a simple revision routine
- Shortlist days using the overview.
- Select exact locations and the full outing window.
- Read temperature, wind, cloud and precipitation together.
- Recheck before confirming the session and before departure.
- Tell participants when you will make the final decision.
Questions about forecast timing
Is an hourly forecast always more accurate?
It provides more timing detail, but finer labels are not a guarantee of accuracy. Use the detail while retaining a flexible plan.
What if cloud matters more than rain?
Make that requirement explicit. Our cloud-cover guide explains how to interpret the sky information without treating a percentage as a complete lighting forecast.
Explore Fotocast on Google Play or Fotocast on the App Store for current platform features and purchase options.